
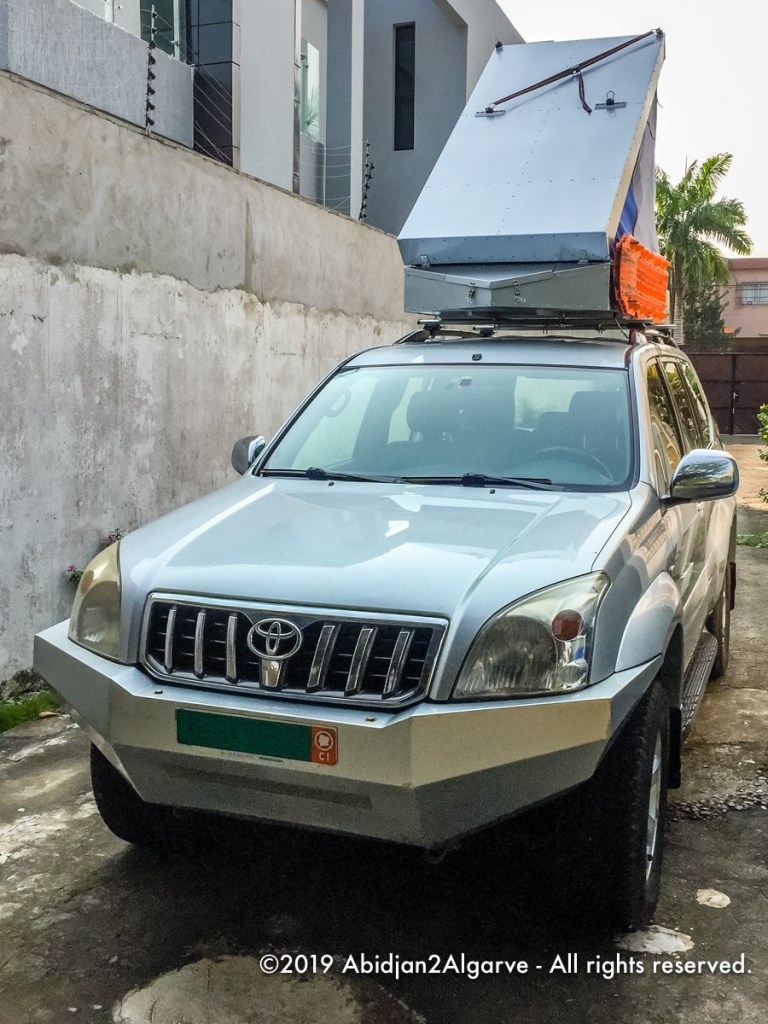
Please meet Eeyore!

This 2009 Toyota Land Cruiser Prado GX was purchased shortly before Christmas 2019 from a colleague who has left Abidjan. He happened to put his car for sale exactly on the same day we received the disconcerting news that we could not proceed as planned with our original cars. It ticked a lot of boxes, same model, same production year, also diesel engine although a little less powerful but rock solid, first and a known owner and for her age low mileage. The decision was taken that that was the way forward to help us out of our dilemma.
Here are some technical details:
- Toyota Land Cruiser Prado GX
- Model: LJ120L-GKMEE
- Build: July 2008 in Tahara, Aichi, Japan
- 2986 cc EFI natural aspirated diesel engine (5L-E) with 70kW (95PS; 94hp)
- 5 speed manual transmission
- 2WD with a lockable transfer case for 4WD and a 4WD low gear
- 5 doors in Titanium Silver (1D4) with a very basic beige interior
- Fuel tank size: 87l
- mileage at departure: ca. 115,000km
The transfer of ownership was not without hiccups. The owner was out of the country on another continent and had to give power of attorney to another colleague who was so kind to sign on his behalf. The car had also been standing on a parking lot for a few of months and was no longer insured and had no valid road-worthiness certificate any longer. Both needed to be arranged quickly before the ownership could be transferred in the Ivorian national system. And this all happened a few days before the Christmas break of 2019 when everybody is travelling and no longer available.
After a number of days at a local garage to get a full service, all fluids changed, all belts replaced, the clutch replaced, the air-conditioning fixed (just imagine driving through the Sahara desert without it) and several minor repairs, it arrived at my house where I transplanted all the cabling I had already installed in my original expedition car over into this one, Eeyore.
The accessories build
In the very early preparation stages the question arose where are we going to sleep? In a tent next to the cars, in a roof top tent, in hotels or even in the cars? I quickly decided that I wanted to rather sleep on top of his car and build a roof top tent than buy a tent and sleep next to it.
Roof Top Tent
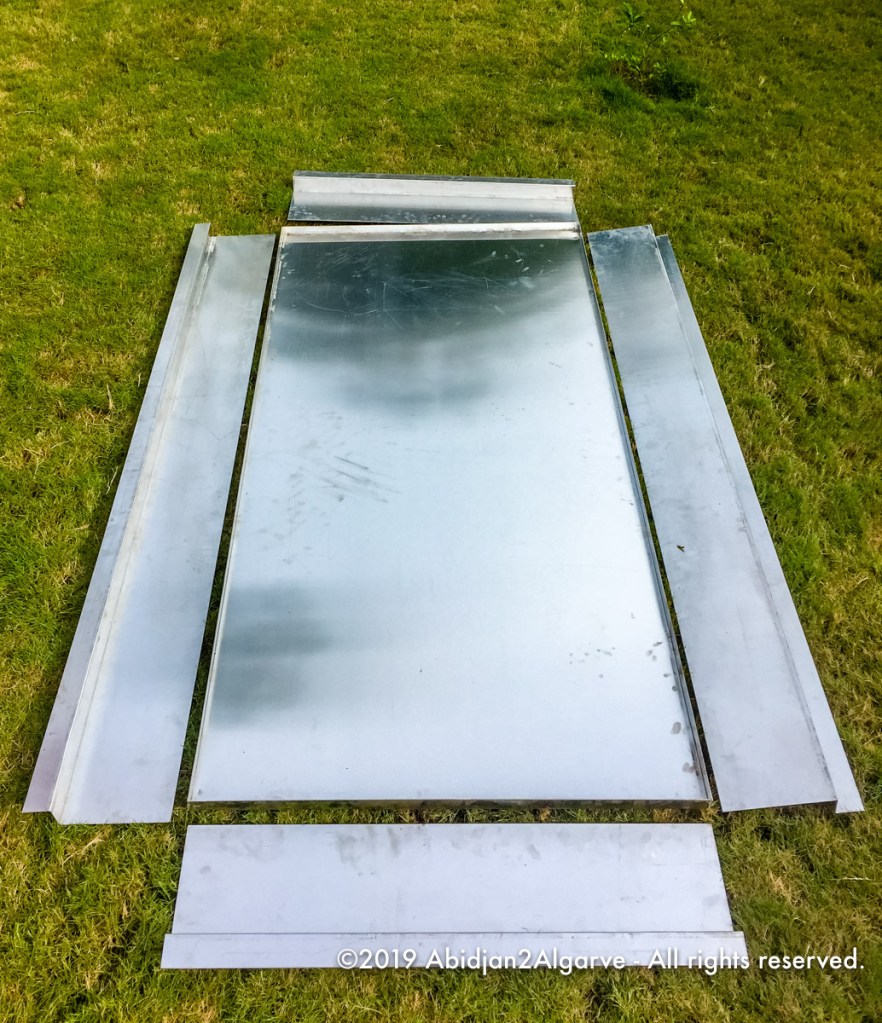
Therefore, I started researching possible designs and what kind of material was available in Abidjan as well as which techniques could be used to join all the seams. Also I watched endless films online from and about overlanders and camping outfitters where I got many inspiring ideas for his own design. I also preferred to have a proper mattress instead of a thin slap of foam. A normal mattress meant a proper sturdy box was needed and since weight was a concern, it had to be made from aluminium. Late 2018 I spent countless hours behind the computer and digitally drew the design to figure out if all works as intended and what kind of material he needed for the project.
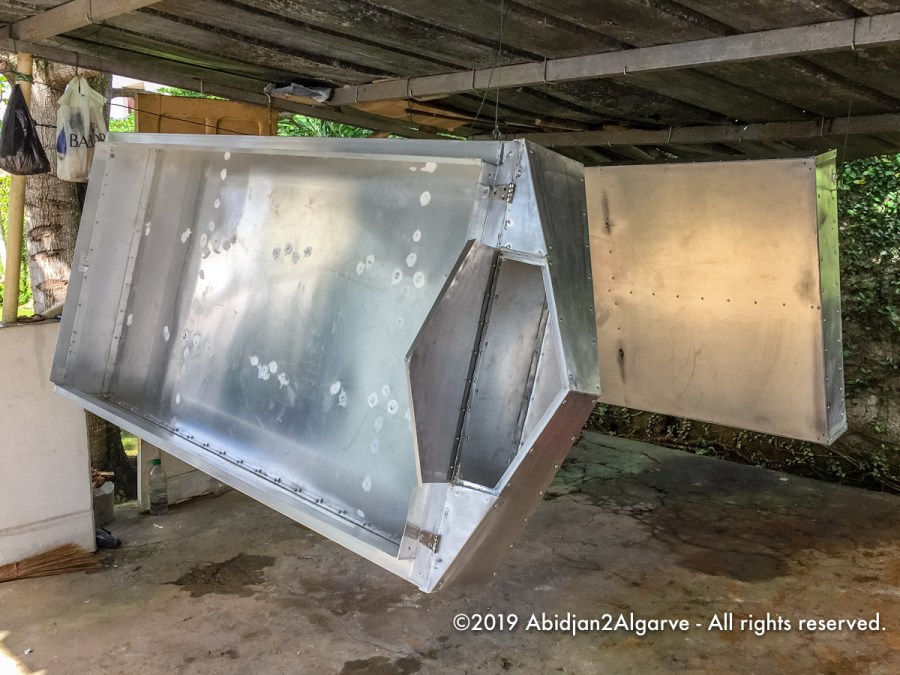
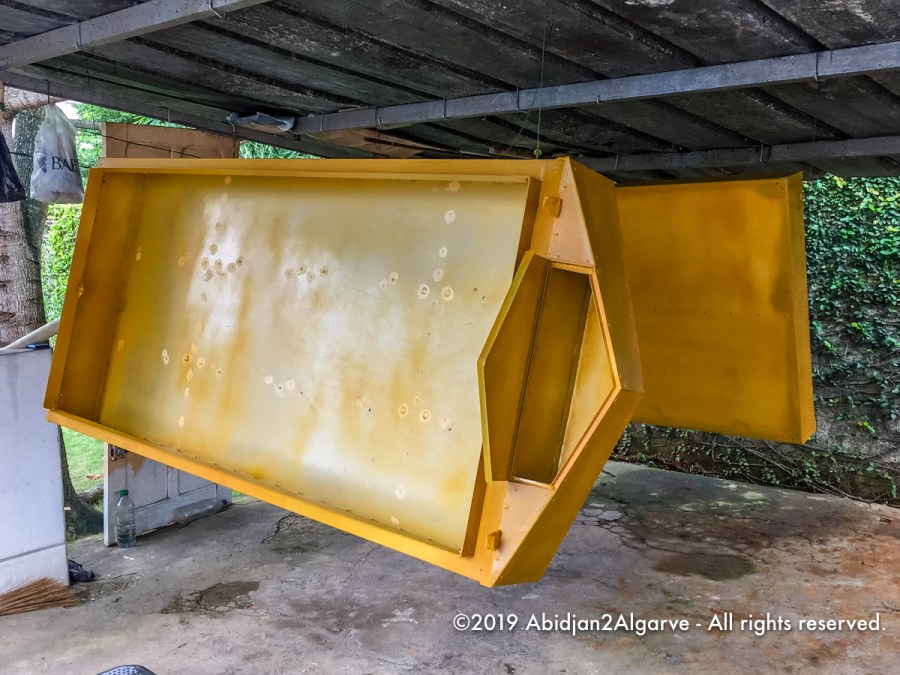
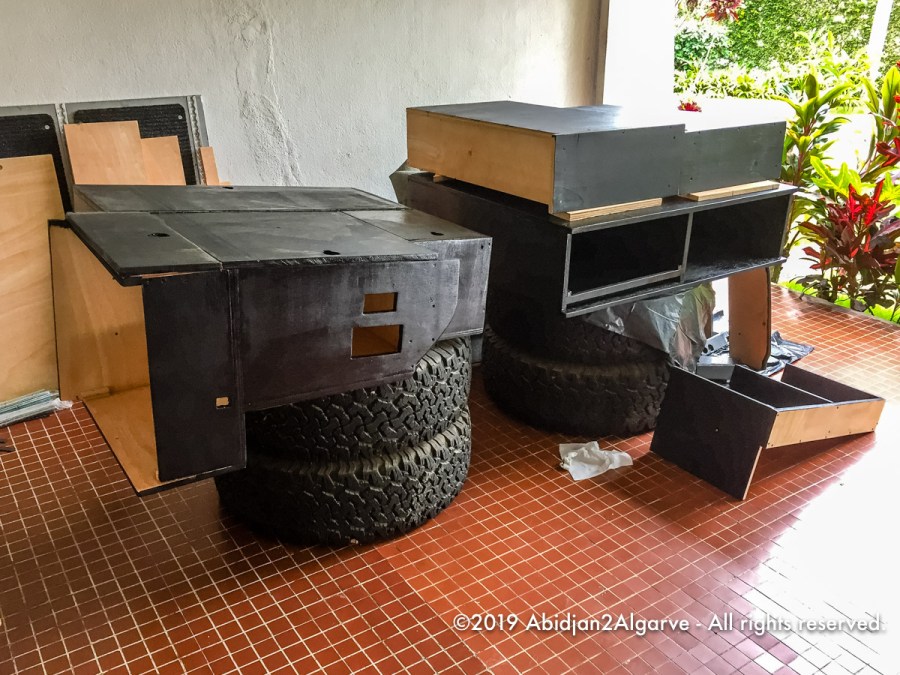
Due to the maximum size of aluminium plates easily available in Abidjan and no one could trustfully weld long beats of aluminium here, I decided to split up the box in large parts, have them cut and bent by a local company and then glue and rivet the joints together into two large boxes, the bottom one that houses the mattress and the top lid.
The mosquito net and canvas were locally sourced but most of the accessories such as hinges, handles, sturdy zippers and the so-called 3D under-mattress to enable the very important circulation under and around the mattress to prevent condensation and moulding were ordered online in Europe and delivered to his parents’ house.
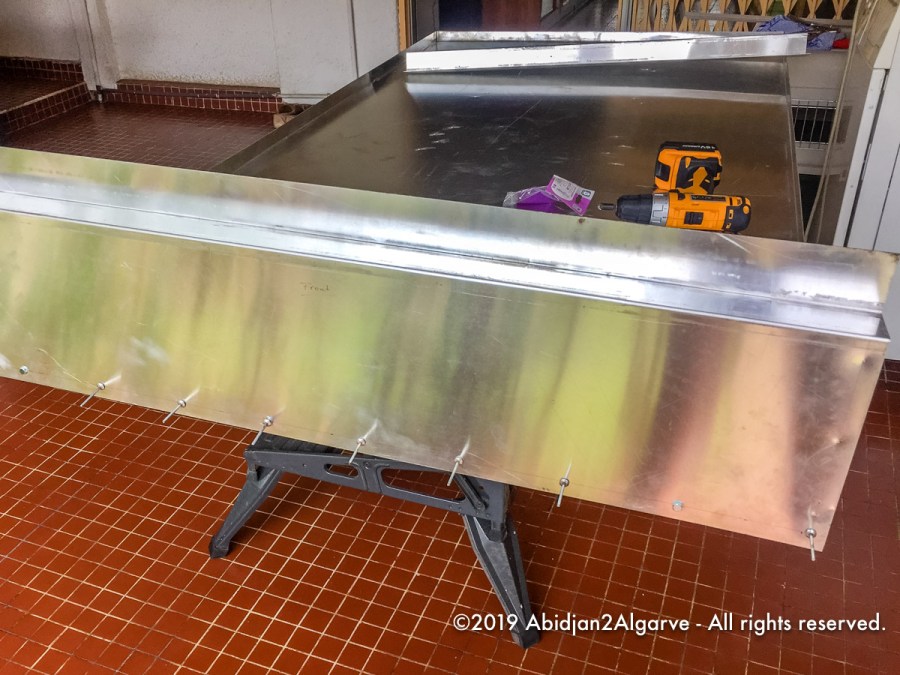
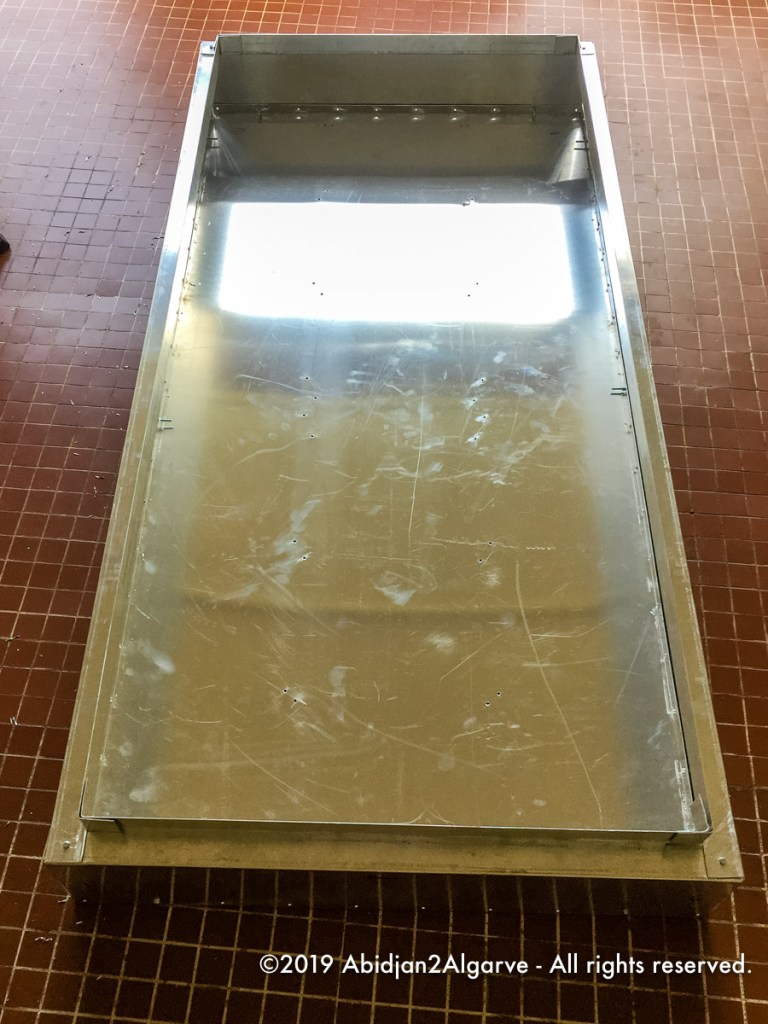
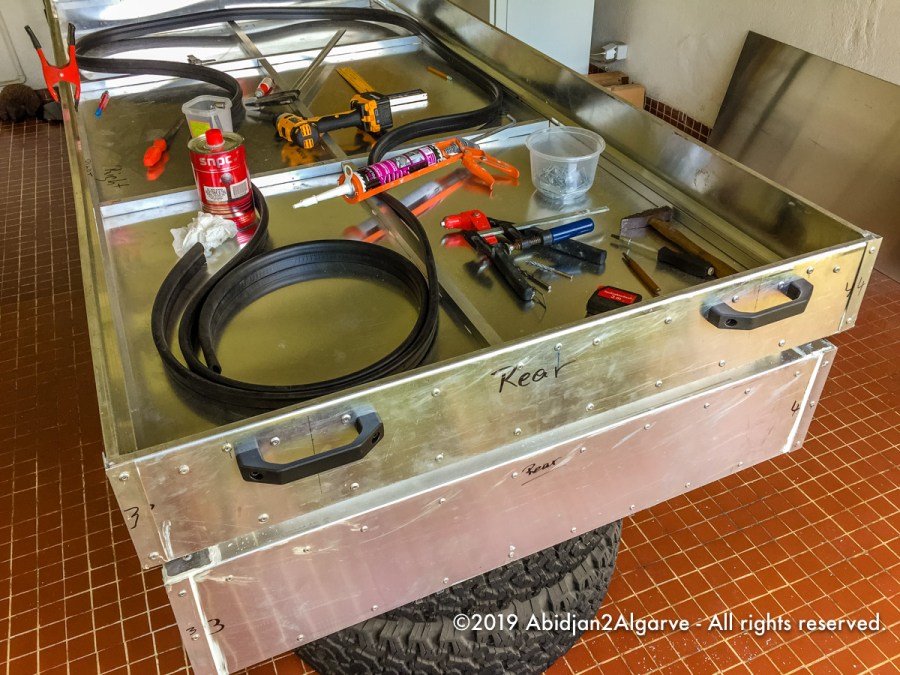
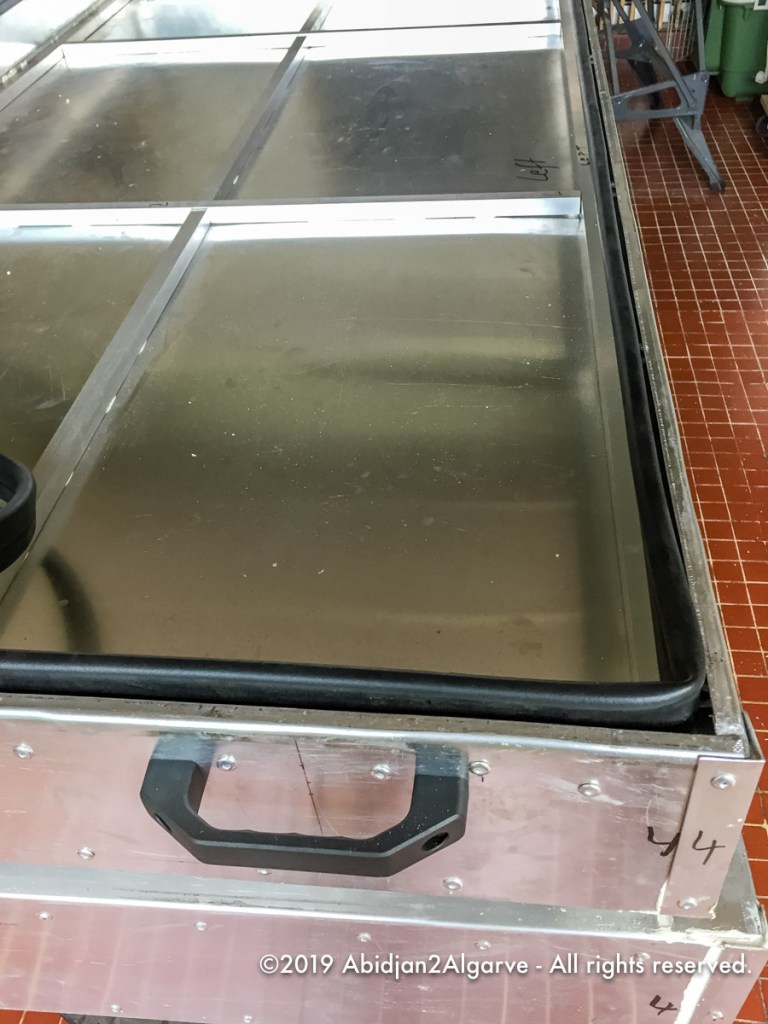

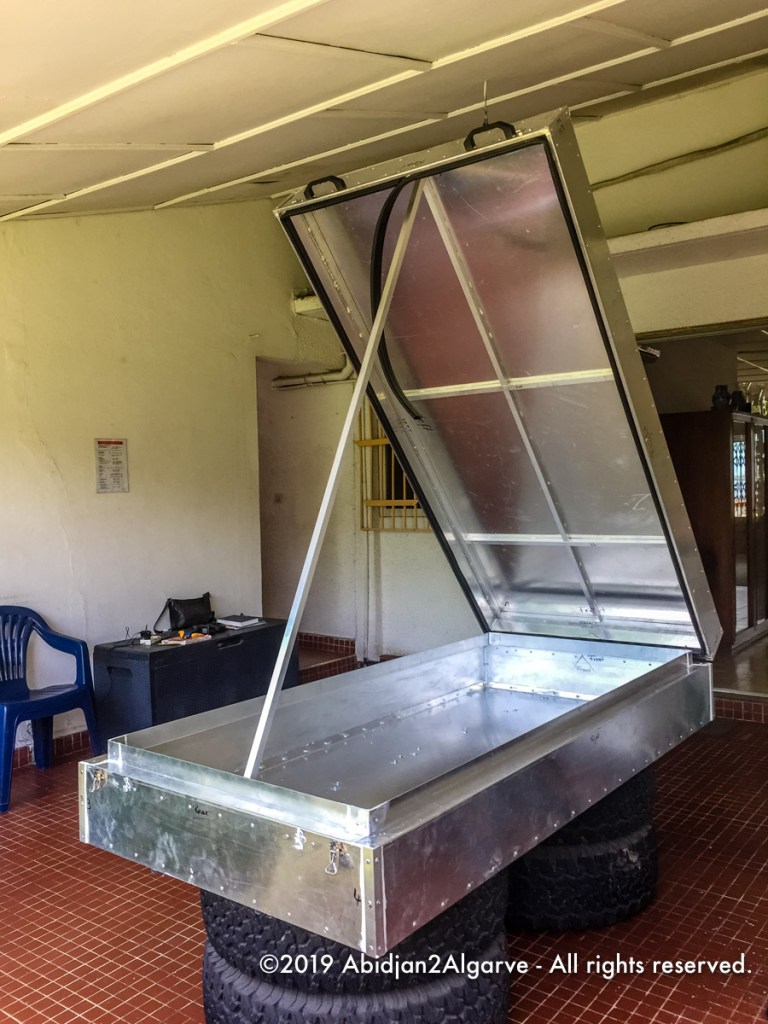

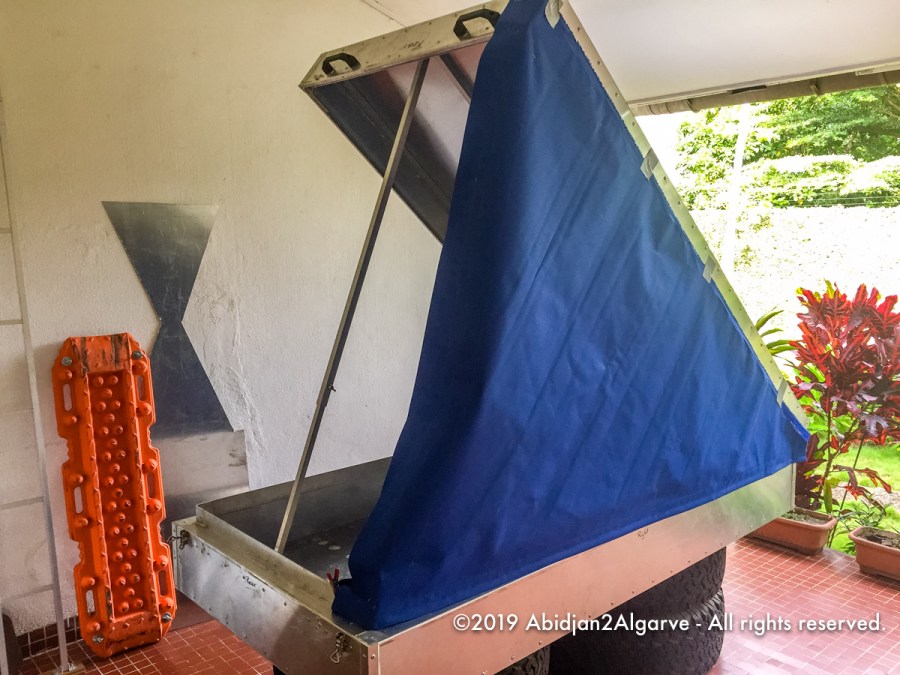
Early March 2019 I started with the construction of the boxes. It went well. Late March the two trays had been assembled. From the visit to my parents in April, I returned with an extra suitcase full of accessories for the build. They were test-fitted and the entire roof top tent at this stage was placed onto the roof of the car for the first time. It was then when he noticed that the planned fastening system onto the roof cross bars would not be strong enough to support the roof top tent properly and panels started bending. At this point the design was altered and a stronger aluminium square tubed grid was placed underneath to support it and secure it to the roof cross bar. In the end more than 430 rivets had to been drilled and hand-riveted.
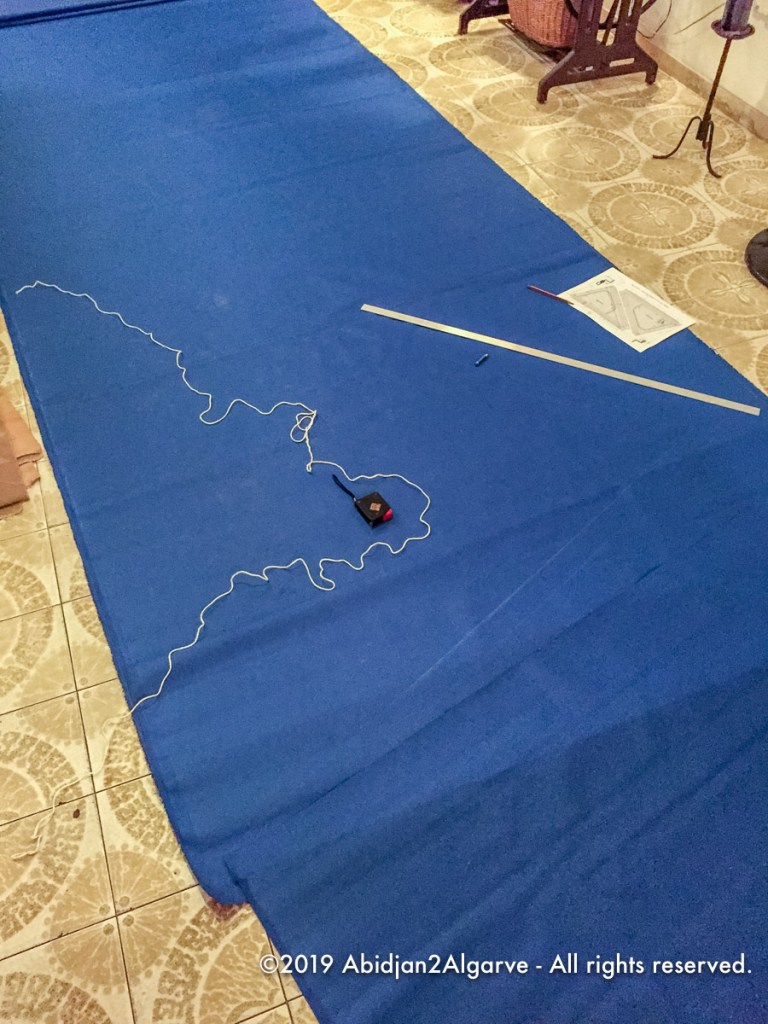
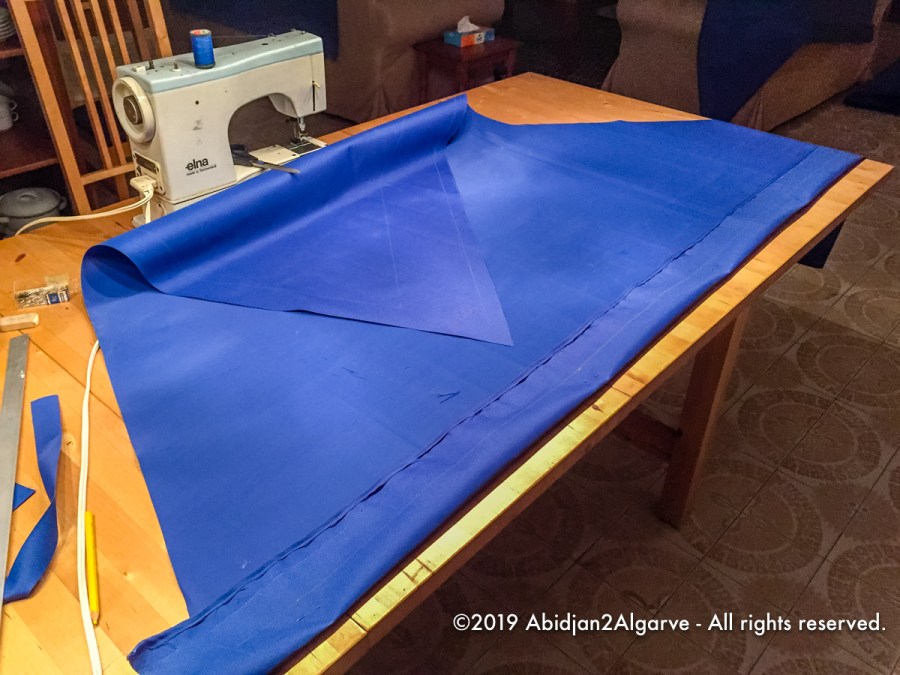
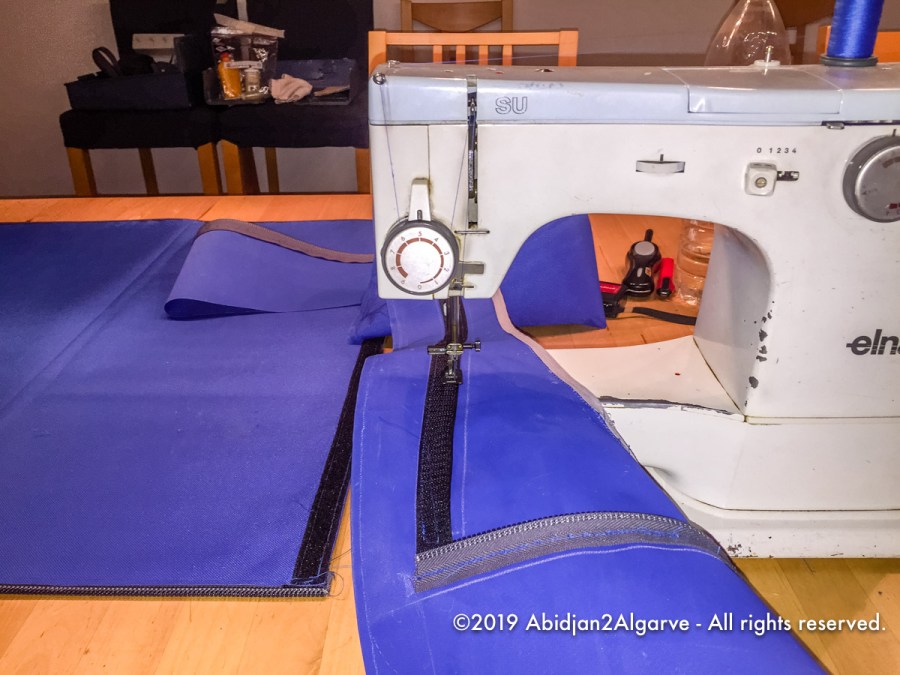
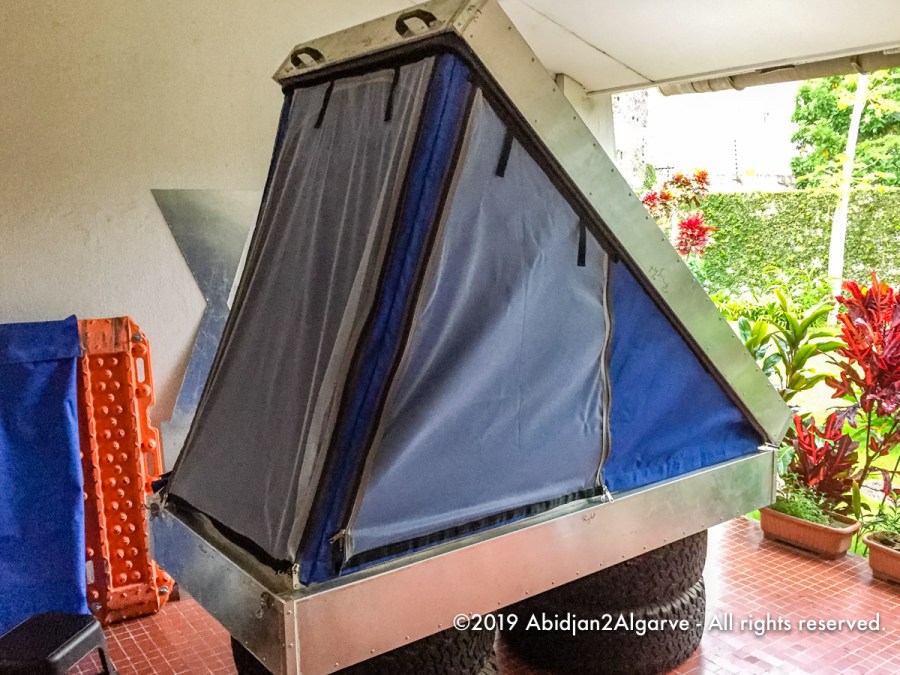
In June I had the opportunity to borrow Charlotte’s sewing machine and started on the production of the roof top tent’s fabric shell. It wasn’t easy handling such large, very stiff and slippery canvas pieces. Measuring and cutting took place on the living room floor and the sewing was managed on the dining room table that was barely large enough to support the masses of fabric. Windows with mosquito nets were made and provided with sturdy zippers and velcro for easy access and (hopefully) waterproof protection against the wet elements. The zippers proved to be too sturdy & stiff to make nice arches, therefore the design of the tent was altered and the windows/doors became straight lines. It was a struggle to join all three sides of the tent together but with clever folding and two pairs of hand it was accomplished. At the end of June the canvas was attached to the shells and for a final test-fit before the top and bottom shell were spray painted.
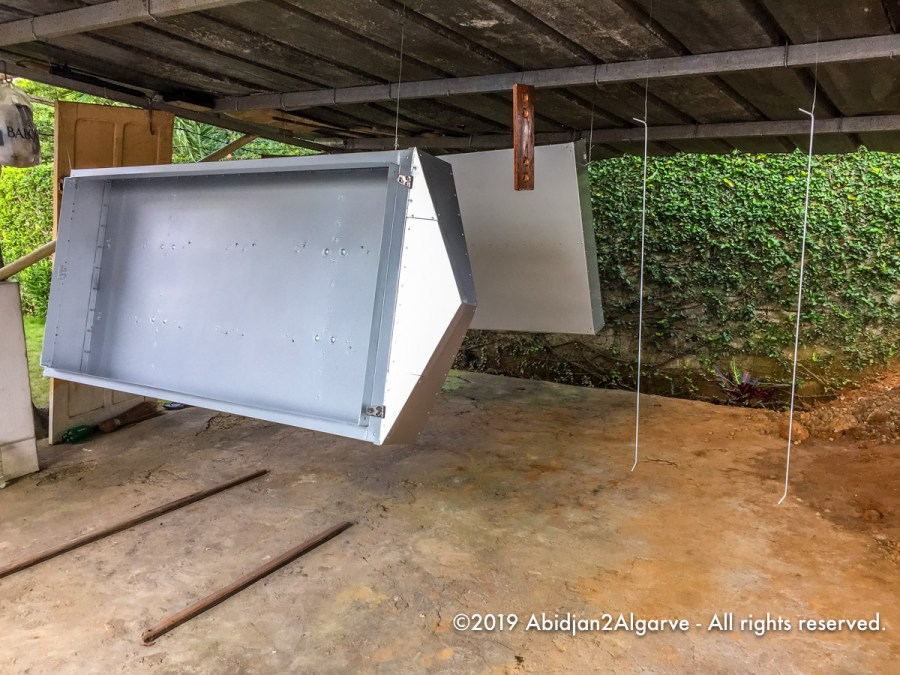
The shells were suspended from the car port for spray painting. After a special coat of aluminium primer the shells received two coats of Titanium Silver (1D4) automotive paint to be followed by three layers of 2k clear coat to make it resistant against sun, rain, sand and any scratches from low hanging branches it will have to endure on the trip.
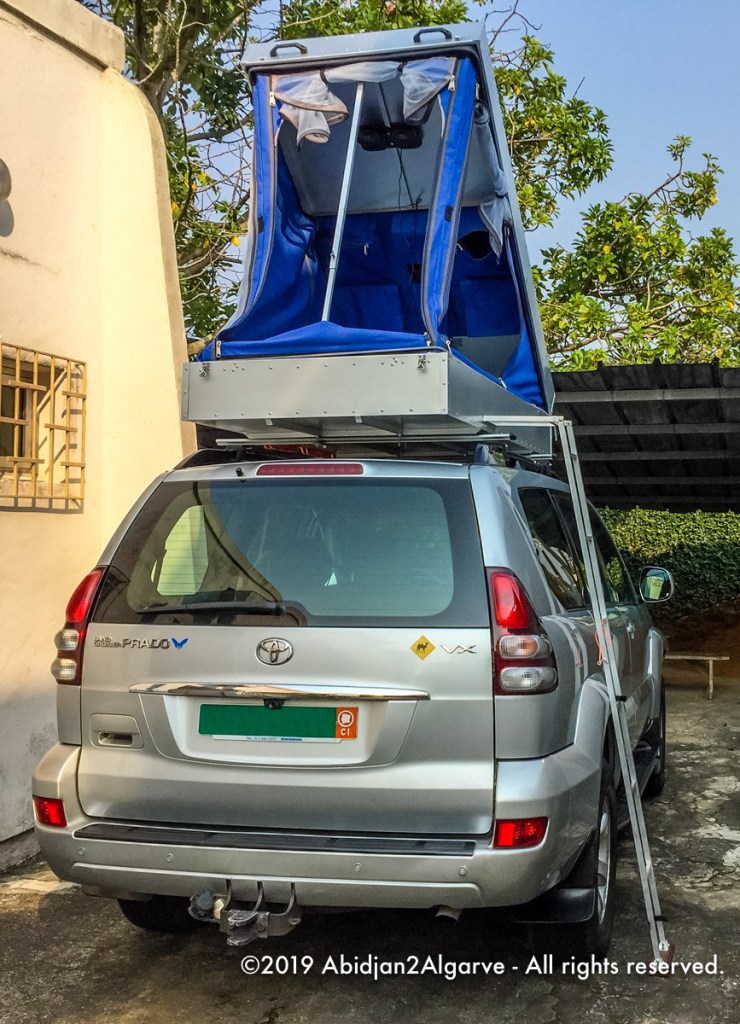
After painting everything was reassembled for a final time and the roof top tent was once again test-fitted to the car. A few little details were still missing though and were added at a later stage such as the little awning to prevent sun or rain from entering the windows/doors.
The inside of the roof has been fitted with some pockets for storage, two little 12V fans, to make the West African heat slightly more bearable, a 5V USB and a 12V charging port as well as some LED lights.
Interior: custom made boxes and drawers and electrical wiring
I also knew from the beginning that I wanted to build a customised interior for my car. Only then you can use the space you have in the car to its full potential. After studying what was available commercially and many forums what other people had built, I drew up his own plans at the same time as he planned the roof top tent in February 2019.
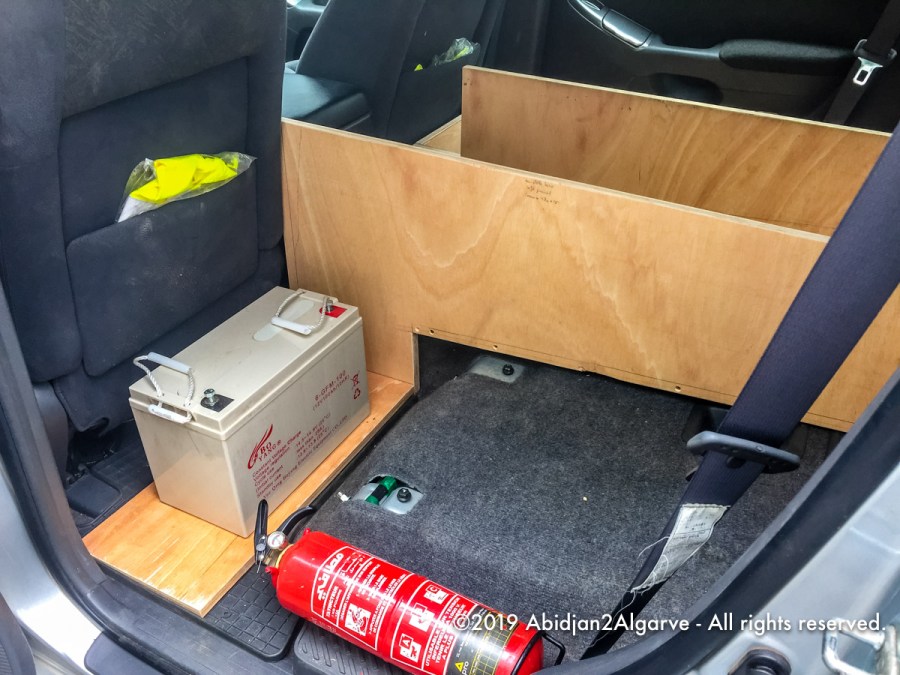
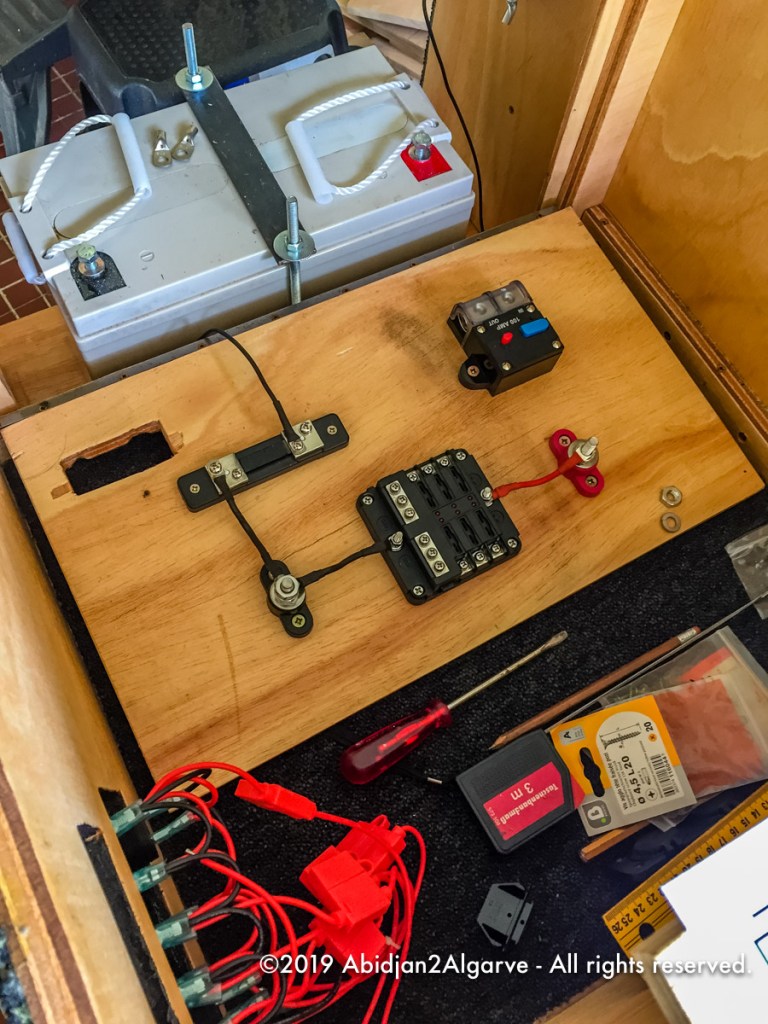
As a number of accessories were not available or only at ridiculous prices in Abidjan, these needed to be ordered in Europe or China. Especially the electrical wiring for the auxiliary battery was not available in Abidjan and was mainly sourced in South Africa.
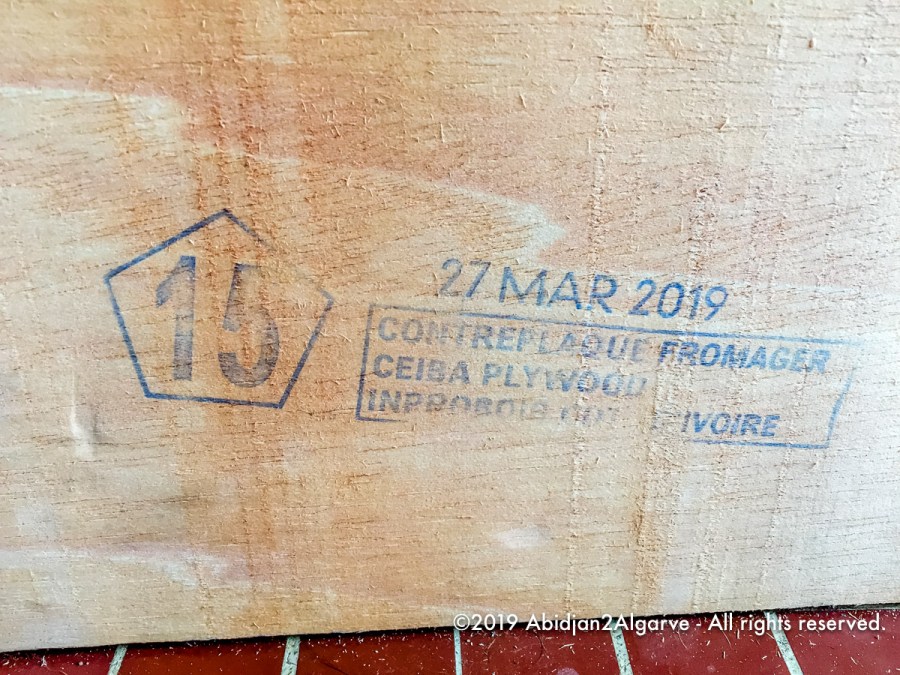
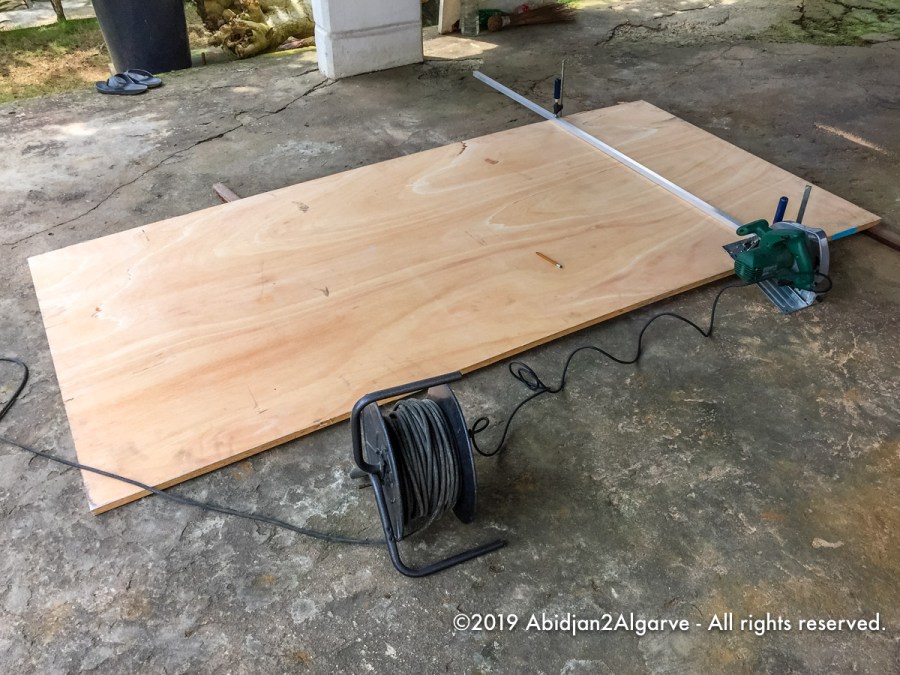
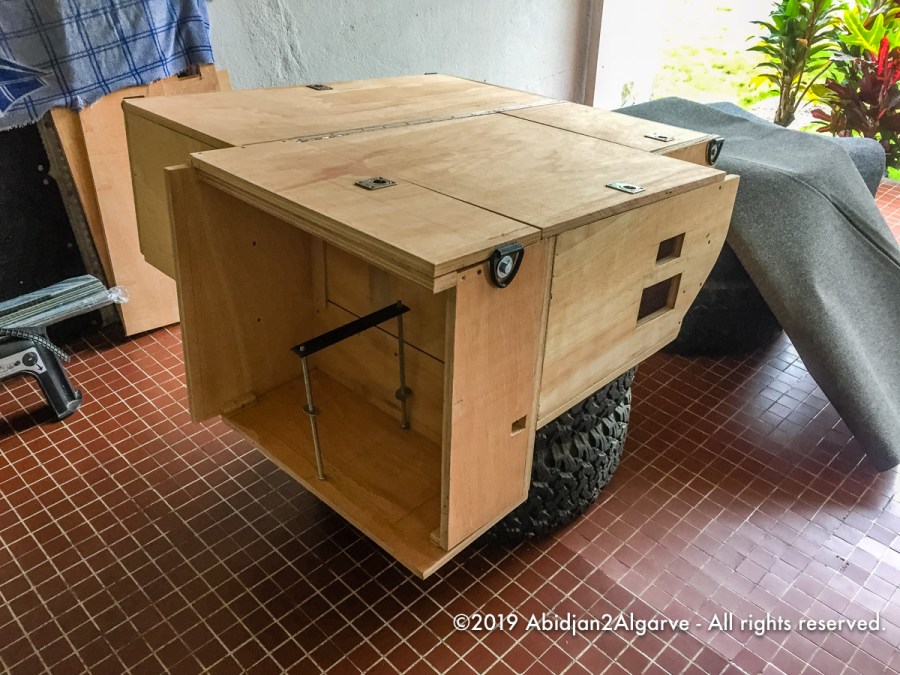
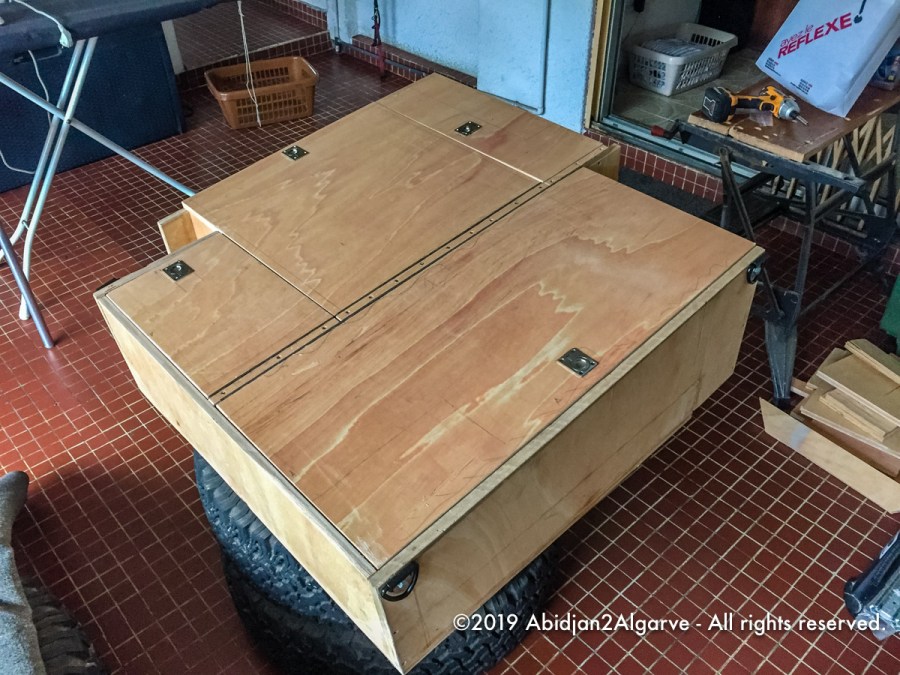
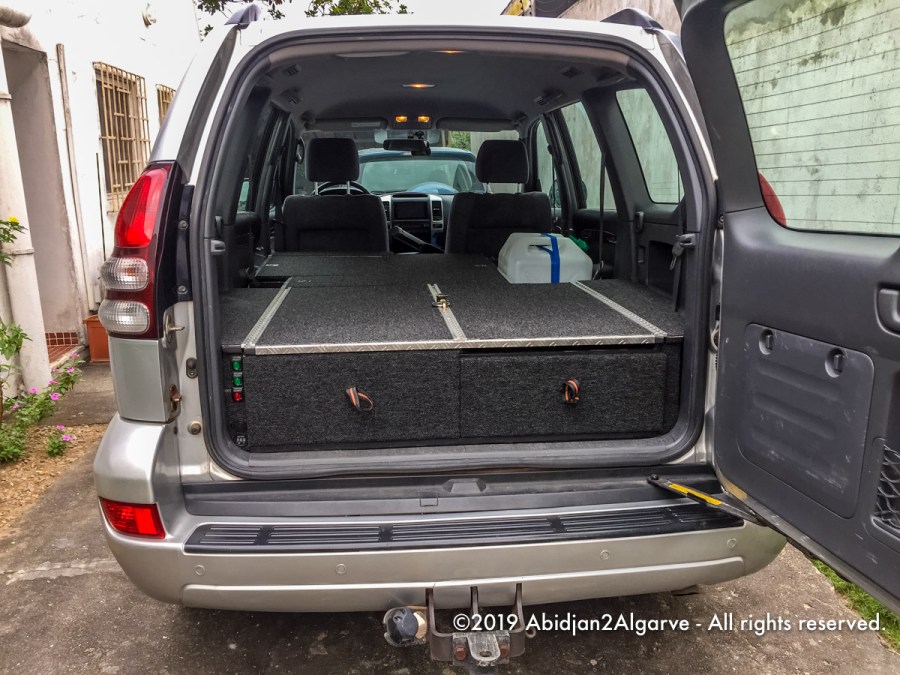
At the beginning of July 2019, the work on the interior could be started after the roof top tent had been finished. Local plywood made from ‘Fromager’ (Ceiba in English) in 15mm and 18mm was bought. The interior was supposed be sturdy enough to carry all the load but also to, in case of an emergency, sleep a person on it. As Fromager is a very soft type of wood in which screws doe not hold well unless there is some substance around them and the quality of the plywood was o.k. but had some faults in it, I decided to choose slightly thicker panels to be safe.
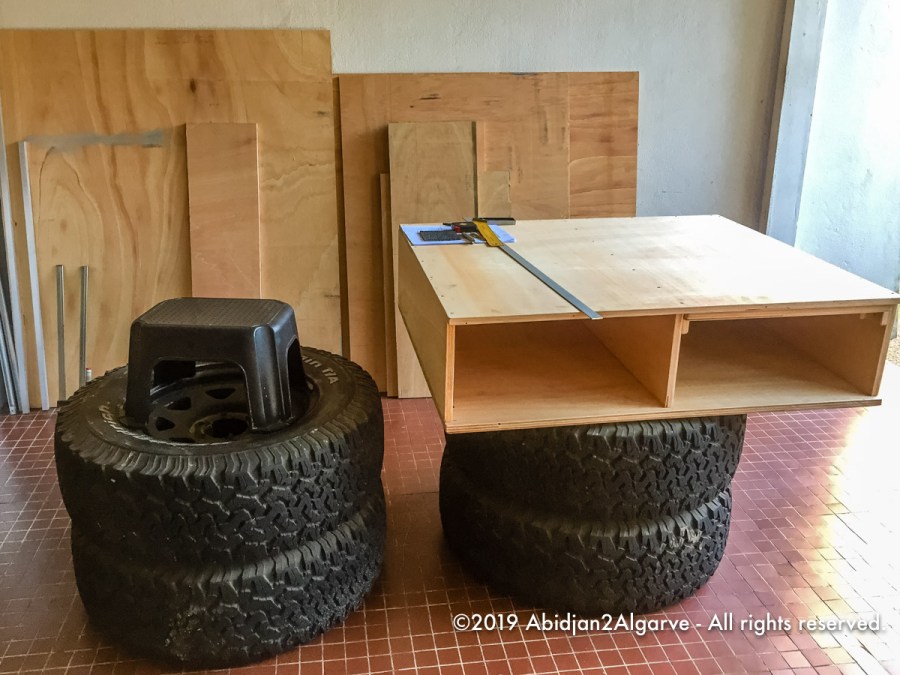
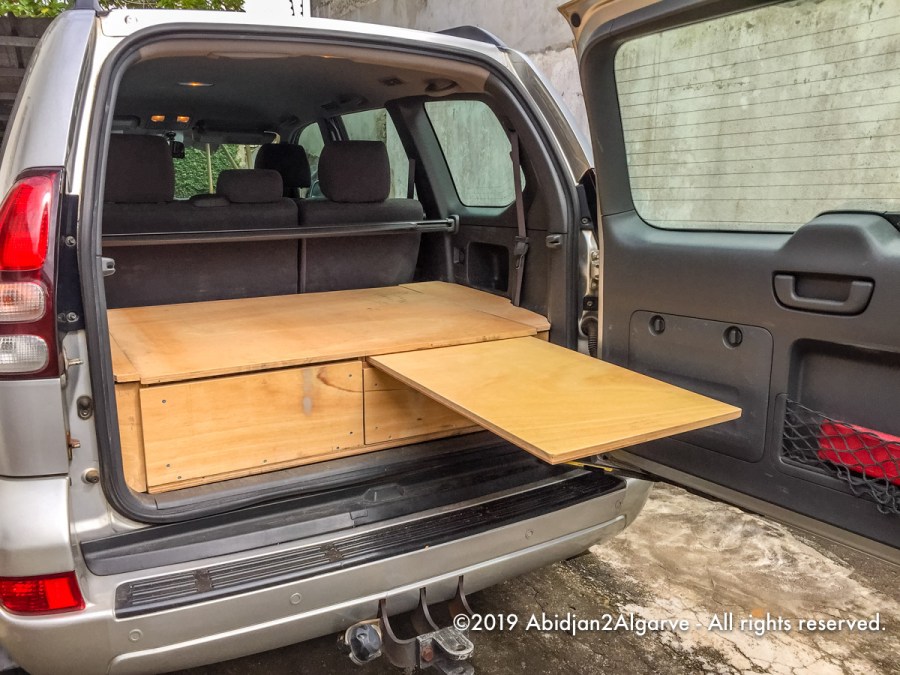
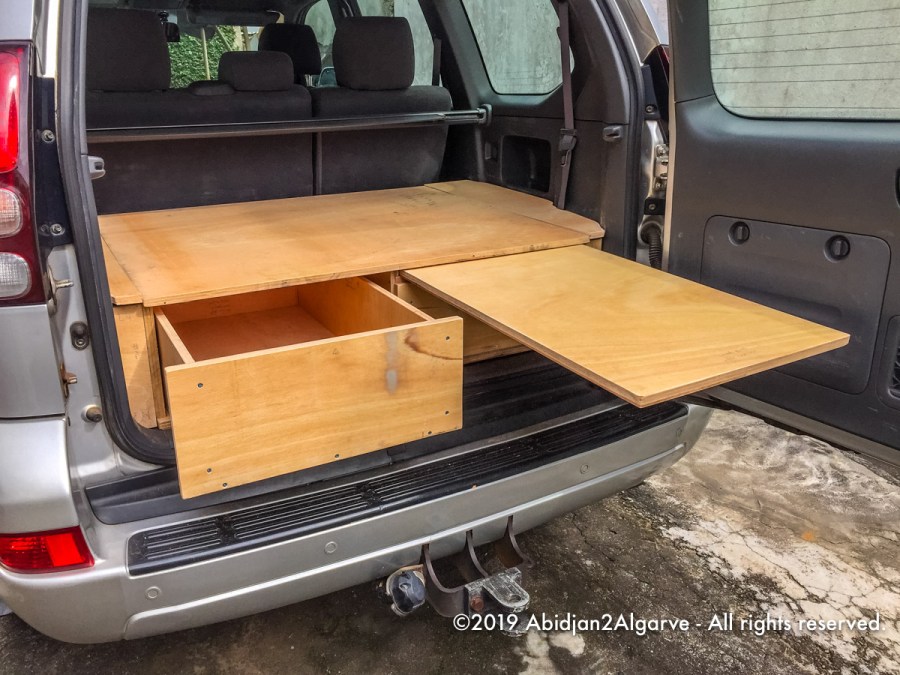
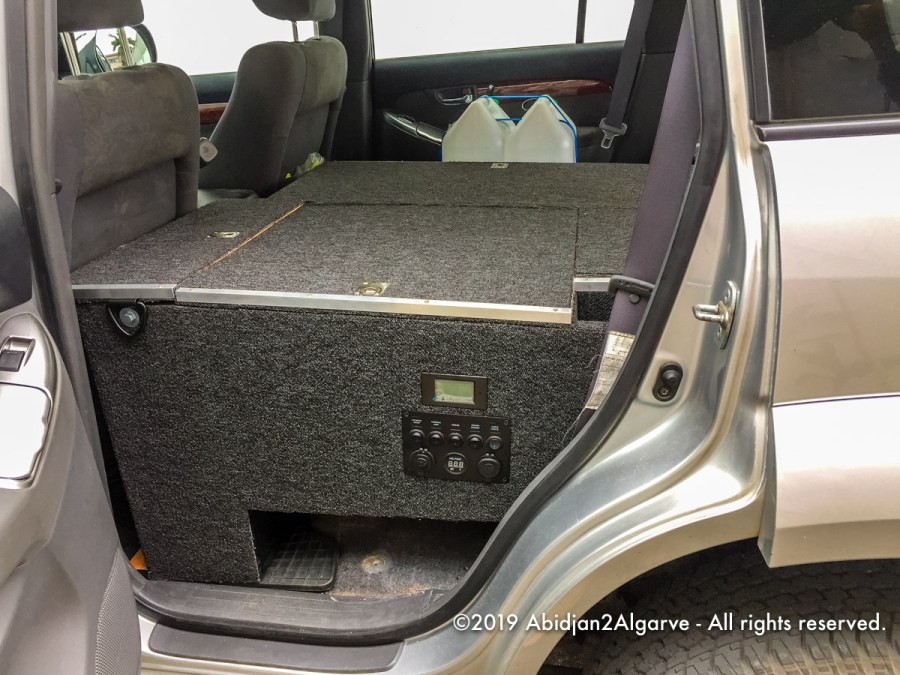
In mid July 2019 the rear drawer section, with two drawers and an extendible work top, took shape and was test-fitted several times. To anchor it down securely, it uses the hooks into which the third row of seats usually latch into in the floor and it get tied down to the standard anchor points with a turnbuckle on each side.


270º Awning with shower curtain
Living in West Africa and having travelled extensively on the continent I am well aware of the intensity of the sun or the possible torrential rain showers. Because we will be travelling at the end of the rainy season we need to protect ourselves from the elements. Quickly the idea was born to also build an awning for the Prado. It should be able to cover us from the sun as well as rain. It should be big enough to seat us under it comfortably and allow us to eat or cook our meals if needed. After having studied several designs available commercially, I dared building himself a 270º awning attached to the roof bars of the Prado. Plans were drawn and material lists written. The awning was built in a matter of days rather than weeks as the original departure date came closer and closer. I also added a shower tent to be suspended from the awning for more privacy when changing clothes and showering.
2023 Upgrades and Repairs
Although Eeyore was ready to rumble and for the journey ahead in early 2020, Eeyore has been used a few times for trips during the pandemic for camping where I took notes of small areas I could improve for the new expedition.
Air-conditioning
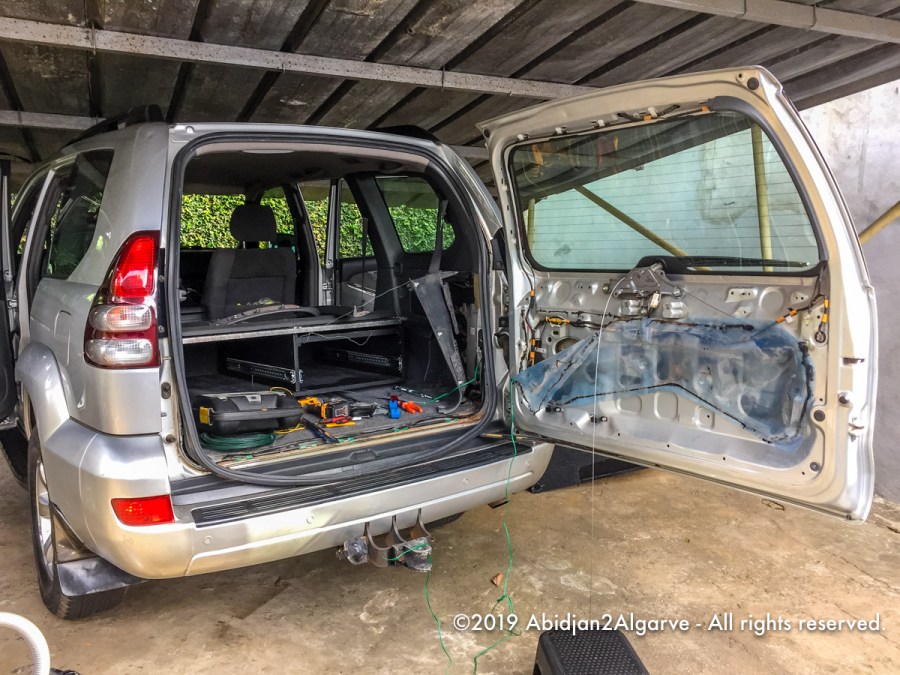
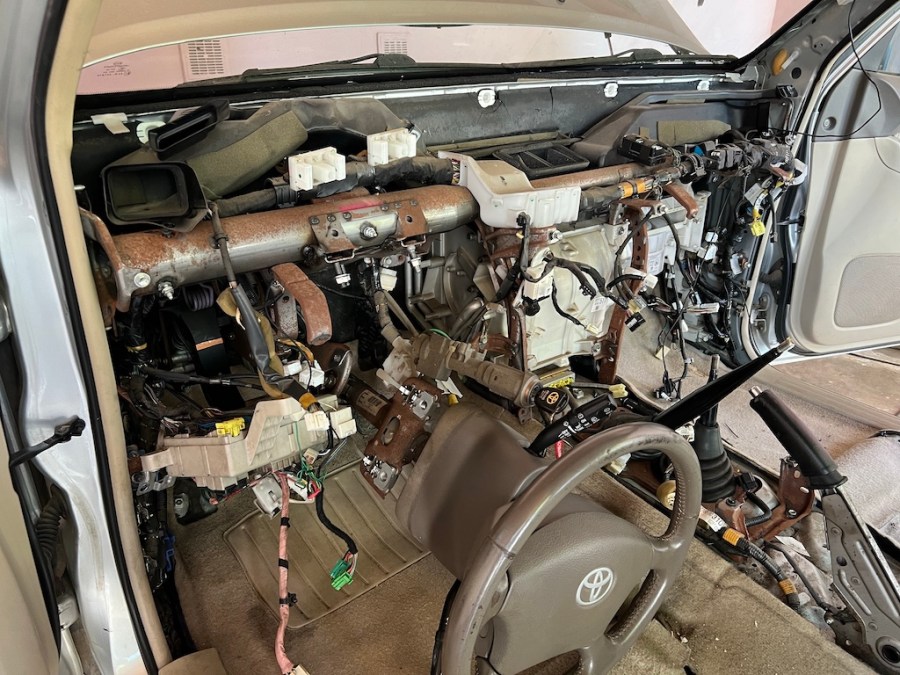
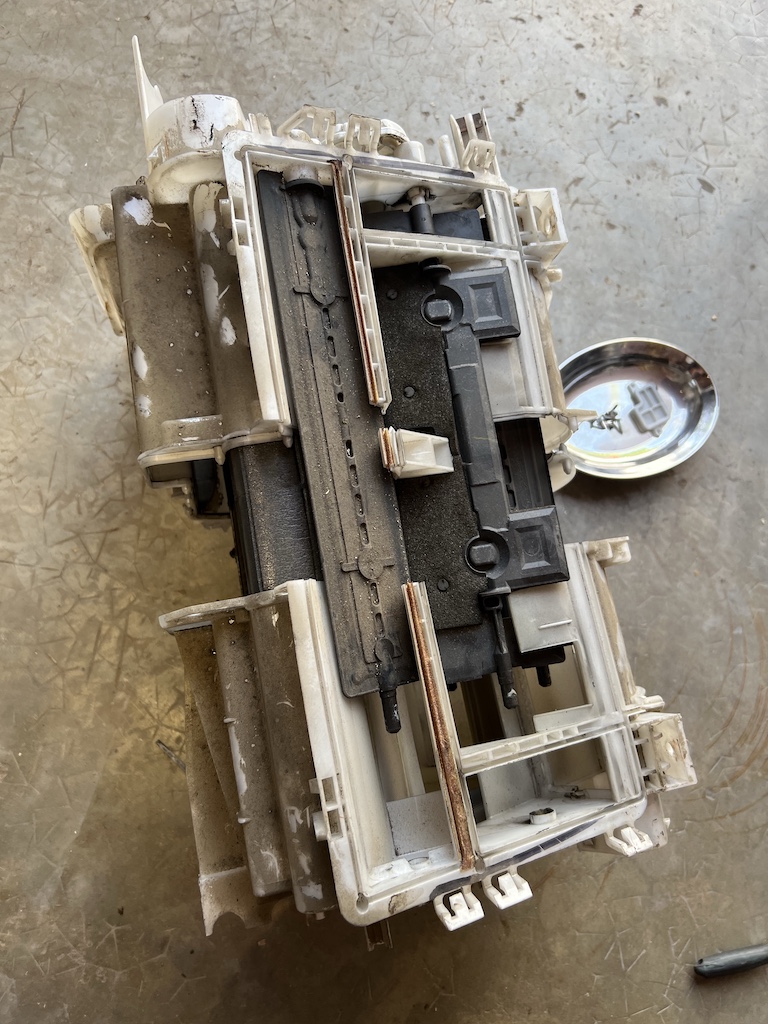
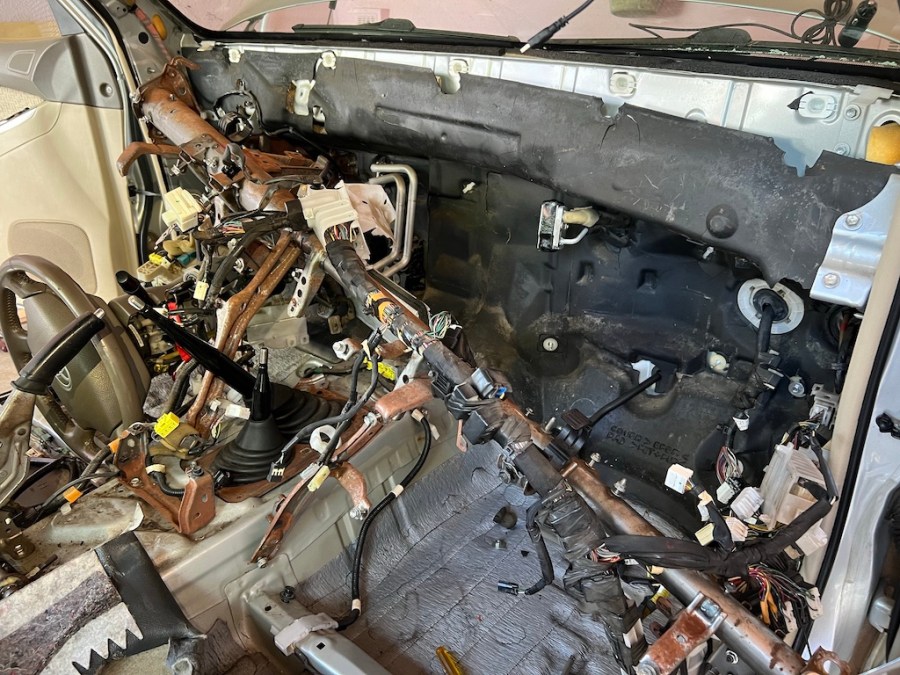
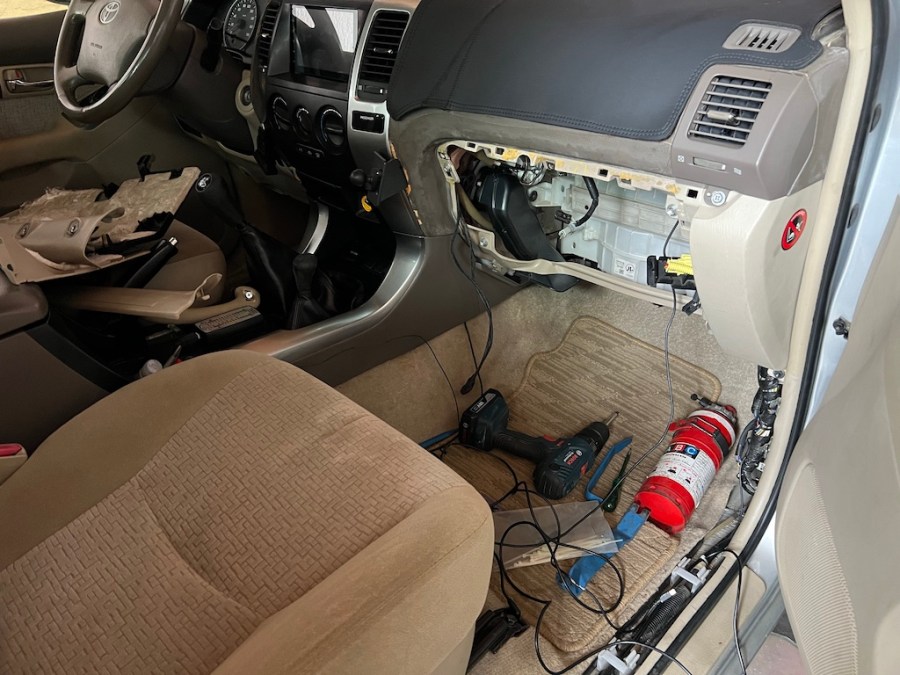
Although I had hoped to have had repaired the a/c in early 2020, the system still lost gas somewhere. After having checked the entire system again and found no other leaks. Having successfully repaired the other Prado’s a/c system by replacing its evaporator for which the entire dashboard has to come out, I came to the conclusion that Eeyore’s evaporator also needed replacing. So in late April 2023, I took the entire dashboard out and completely overhauled the ventilation system and installed a new evaporator. Now weeks after the refill of a/c gas I can finally say the system is fixed and ready for the humid and hot days West Africa is going to throw at us along the way.
Roof-Top-Tent (RTT)
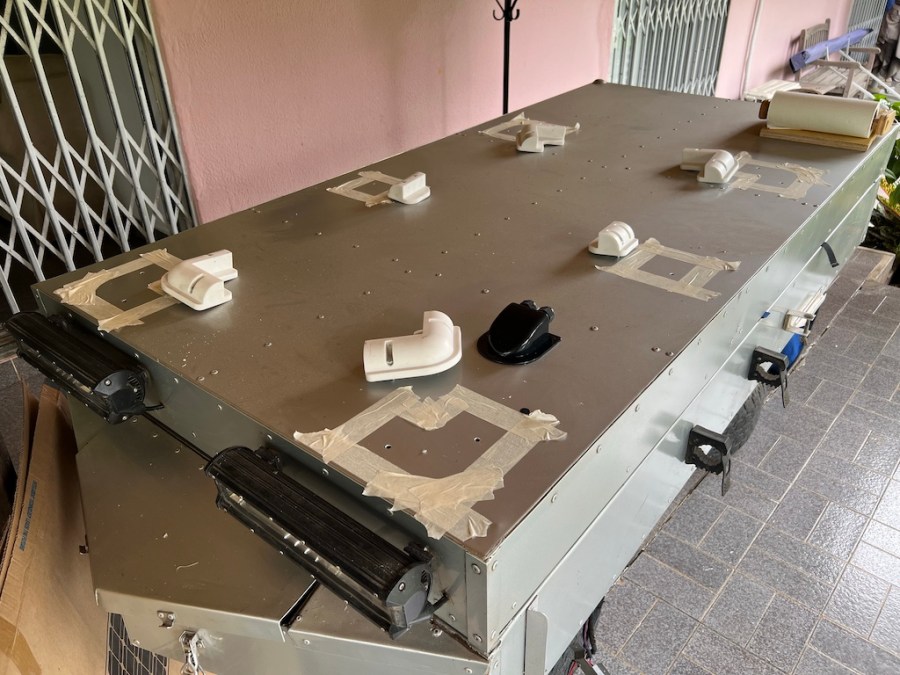
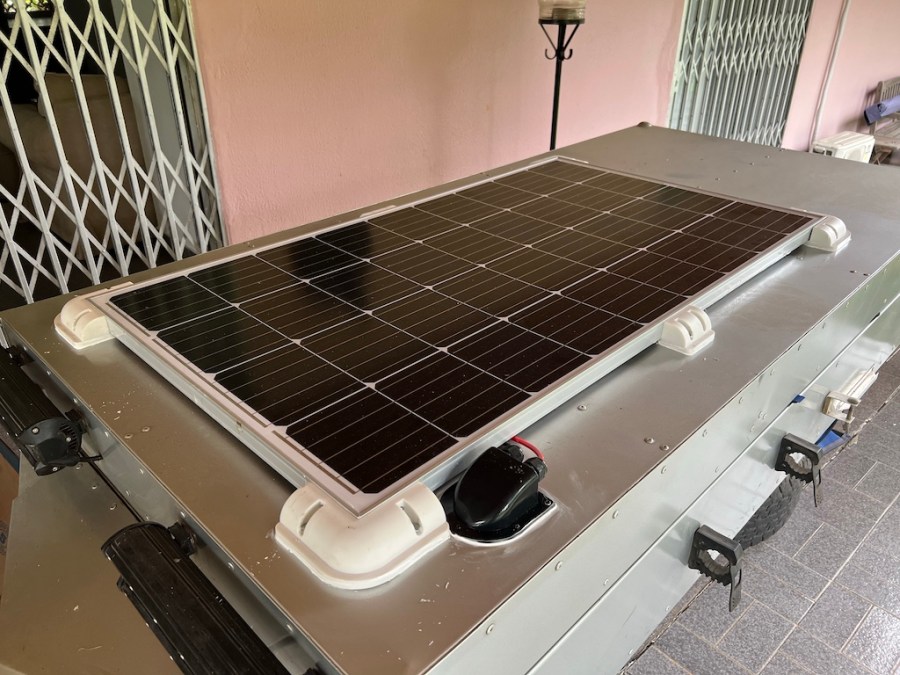
After the RTT got a nice clean after long-term storage, a few little repairs were done to the canvas and zippers. The main addition was the installation of a 120W solar panel on the roof of the RTT. New strong cables had to be run down into the vehicle. That posed a new problem that had to be solved. The thicker cables needed a new way, a waterproof way, of entering the vehicle behind the driver’s seat without drilling holes into the body work. In the end, a plate was made that is inserted into the rear door window, where the cables enter the vehicle and where they are nicely protected and sealed against the elements.

Interior
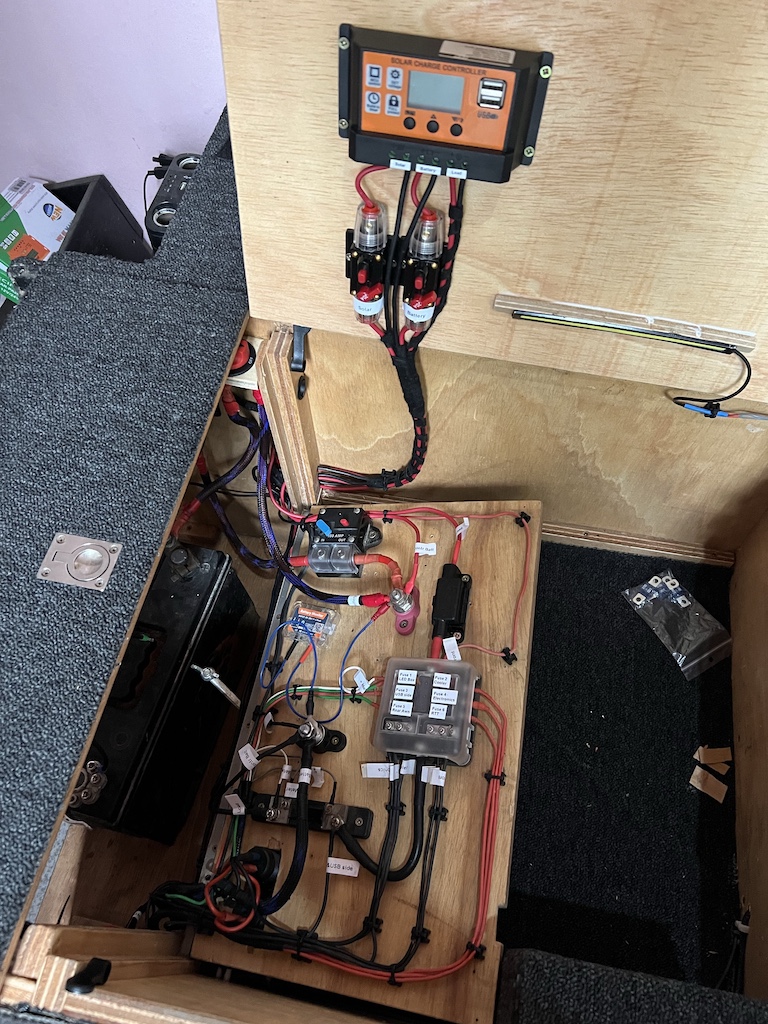
This also meant that the entire cabling in my electronics box had to be updated to the new solar panel with a new charge controller and extra fuses and switches. Hours were spent doing this with parts sourced locally, from AliExpress in China or other sources in Europe. Now everything is installed and the final touches will be done in the weeks before departure.
As feared, the screws anchoring the box lids into the box frame don’t hold in the soft ply wood. Also the lids would not stay open easily. So different solutions had to found and implemented. Now the lids open nicely and stay open even when the car might not be exactly level. A few small repairs were also done.
For the expedition I have purchased a new dashcam with a rear camera. Both are hard-wired into the car and will hopefully deliver wonderful and fascinating footage of our adventures.


You must be logged in to post a comment.